Pages

Monday, February 29, 2016

February in Review

I had a very productive month!

I finished my Valentine patchwork quilt and two comfort quilts from start to finish!

I got my Hillside Houses quilt quilted and bound.


Isn't that texture fantastic! This was quilted by my friend Cyndi at our LQS The Dancing Bobbin.


It is backed with this fabulous metro circles fabric.


And it is bound with scraps of the shot cotton used in the houses.  I'm just so happy with this finish!!

Also quilted by Cyndi this month is my second Farm Girl Vintage quilt.  It is ginormous!  These inside winter photos just don't do this quilt justice.  It is so vibrant and fun.


And of course, it has a scrappy binding.


This is another long overdue UFO that is now FINISHED!

I completed and quilted this top last year and then it sat and sat just waiting for a border to turn it into a real quilt.  Done!


I picked a vibrant green for this border.  It is perfect with the front and those gorgeous raspberries on the back.


That's a total of 6 quilts completed this month!

But I also finished my Polaroids top and made progress on some other WIPs.


I have 23/25 Scrappy Bear Paw blocks done and 33/40 tulips made for the Purple Sewing Challenge.


All of the blocks for my long distance quilt along with my Aunt Charlotte are complete and I've started to work on the sashing. I am really excited about seeing this one come together!

And of course, I created even more WIPs...


I love looking back each month at what I've accomplished.  It really makes me look forward to the month ahead!!

Thanks for stopping by!

Tracy

Friday, February 26, 2016

Finished Polaroid Quilt Top

My Polaroid top is done!!  This one has been in the works a long time, and worth every minute!

I started seeing some Polaroid swaps happening on the blogs a couple of years ago and was instantly smitten.  Many of my childhood photos are Polaroids, so I thought this would be a great way to make an adorable I-spy quilt and be nostalgic at the same time.  I immediately started to collect and put aside some little bits of novelty fabric and tiny white scraps to make the borders.

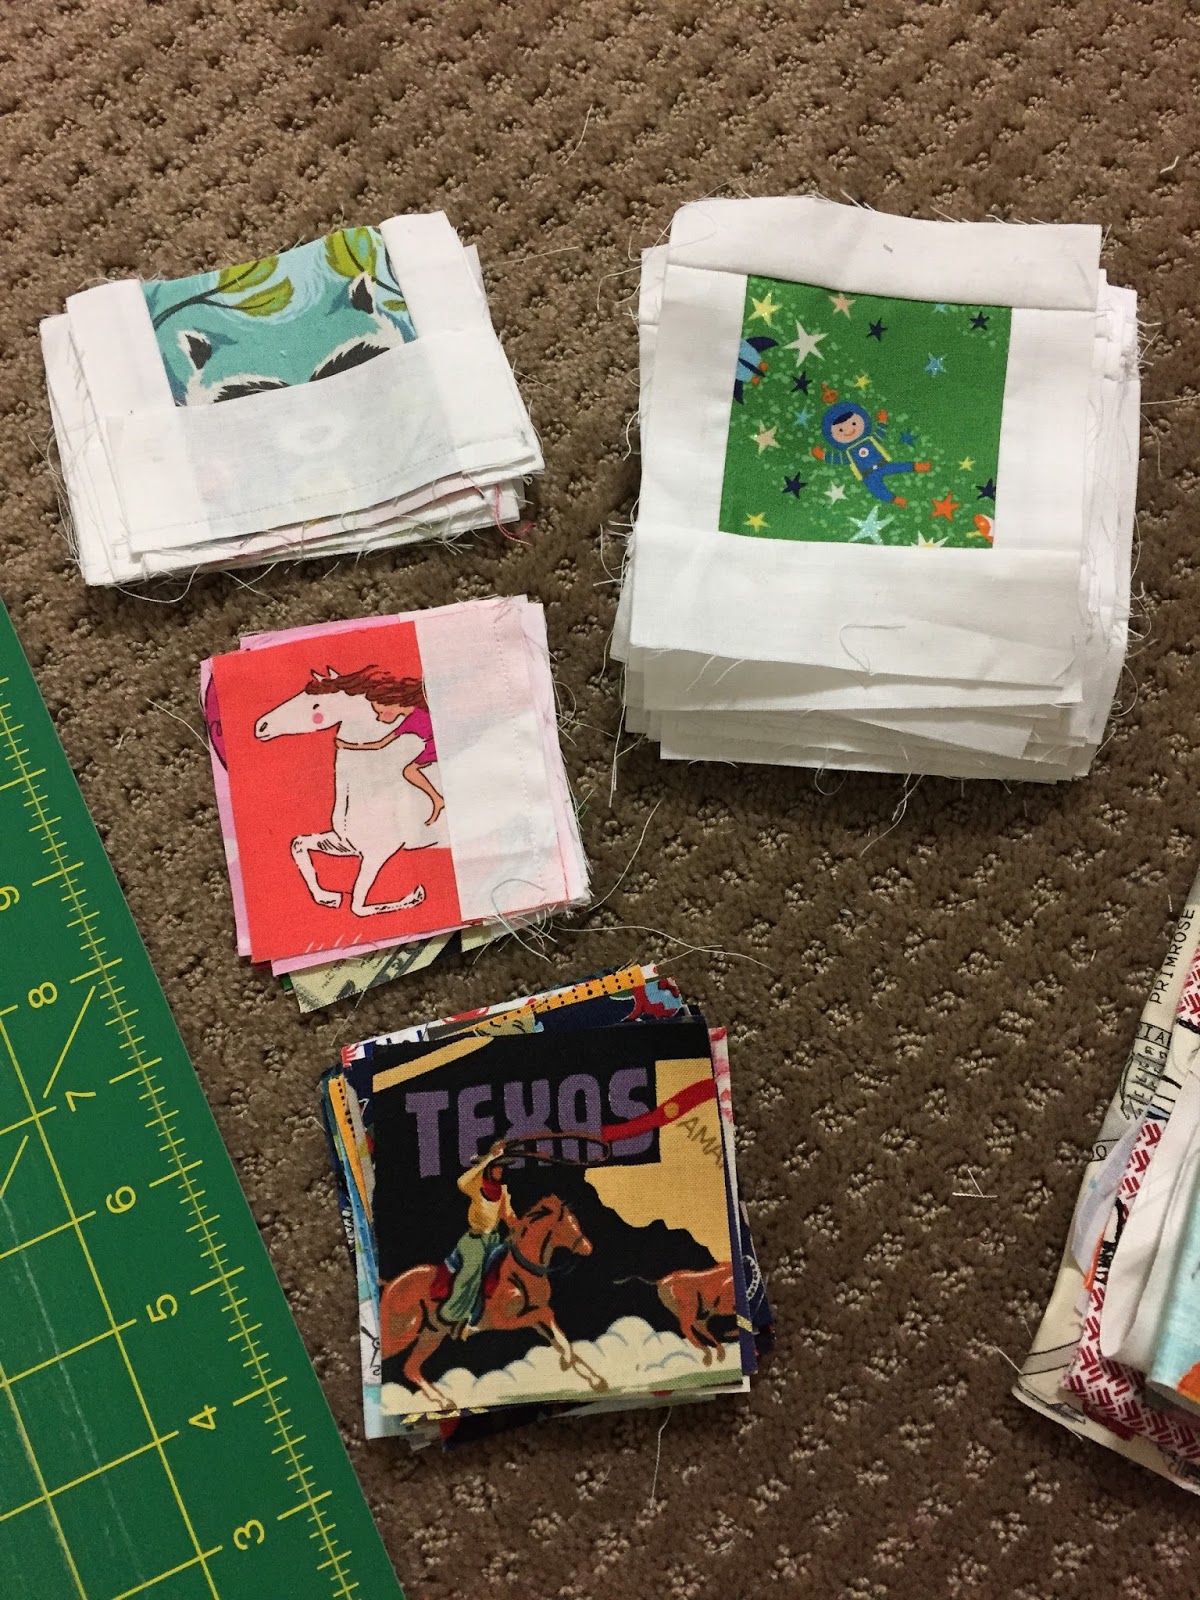
Every once in a while I would take some time to trim the white scraps and sew them on the pieces I'd collected.  Here is what I had when I took it out last month:


I had just over 100 little pieces cut out.  It sounds like a lot, but then I started to draw out a plan...

I decided to make them into blocks of 9 patches with a layout of 5x5 blocks.  That would be about 225 little pictures!! But, it was time for this backburner project to come to fruition.

I picked this amazing blue peppered cotton as my background.  I wish you could feel it, it is so soft and gorgeous.


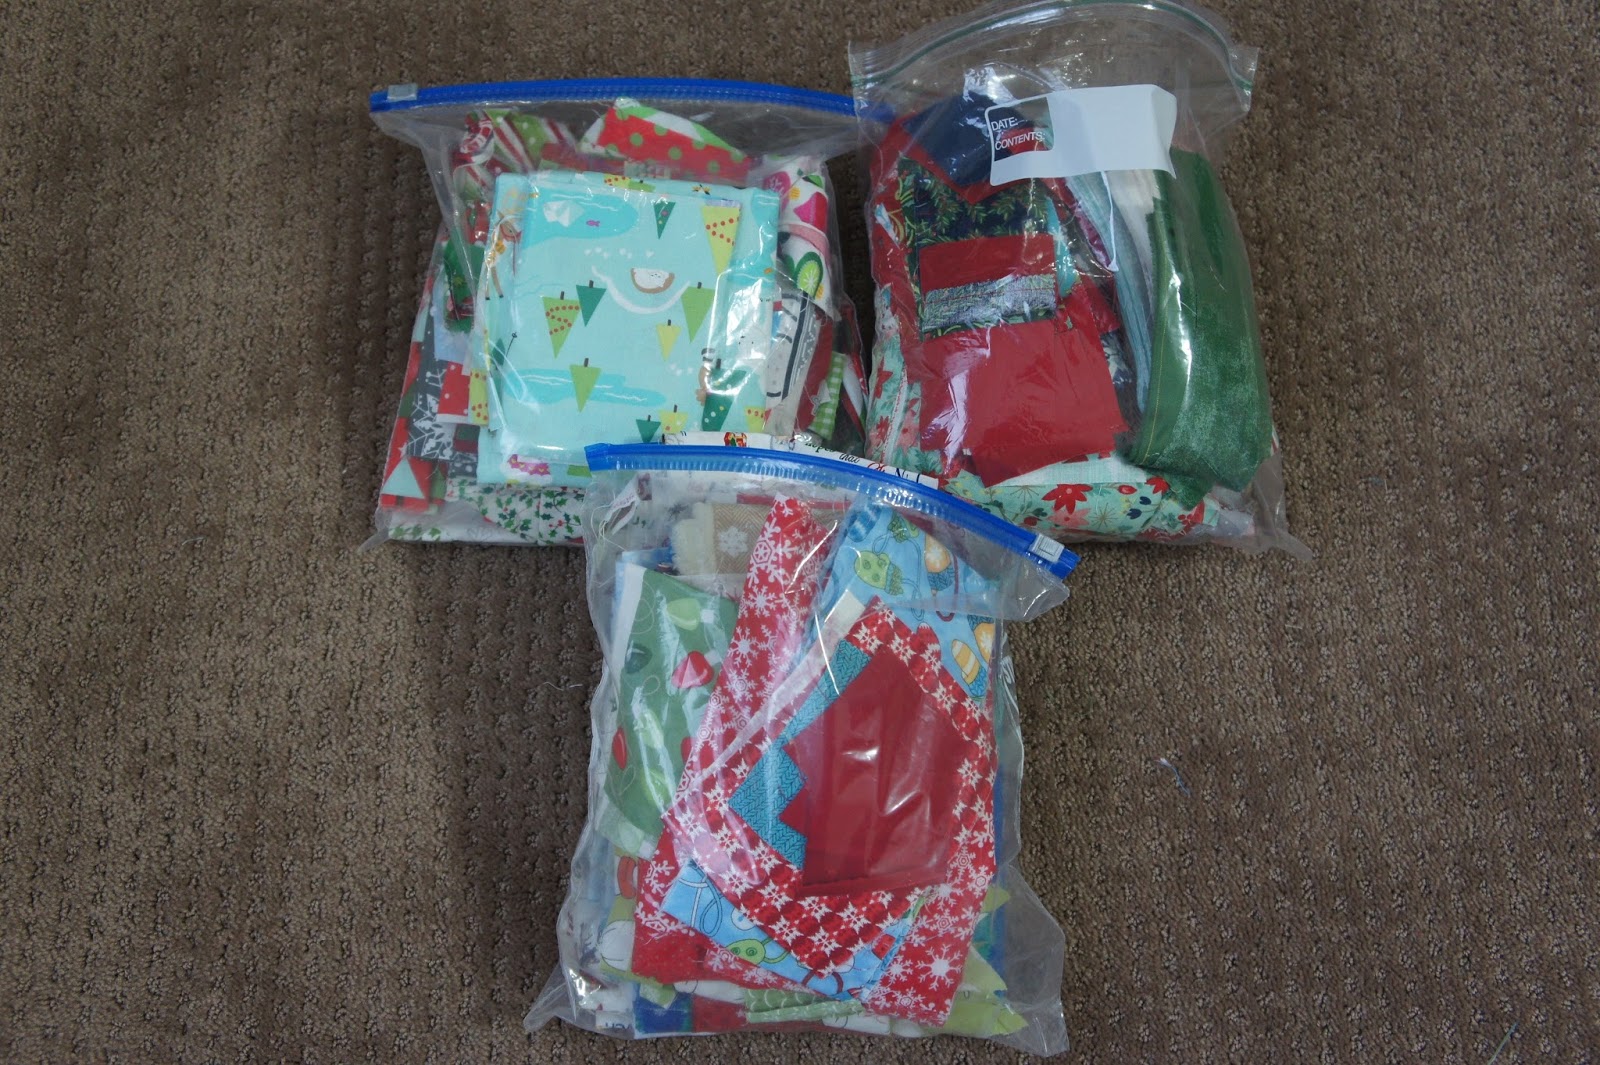
I went through my ENTIRE stash and cut and cut and cut.  Around the same time, there was this fantastic movement on Instagram called #getyourquiltywishesgranted, where you could send out a wish/request for something you were searching for.  I put out my wish for 3 inch novelty prints for my quilt and received about 8 envelopes from some amazingly generous quilters!!

Once I got a rhythm going, these blocks went together very quickly.  Outline in white, outline in blue, trim wonky, build 9-patch, repeat.

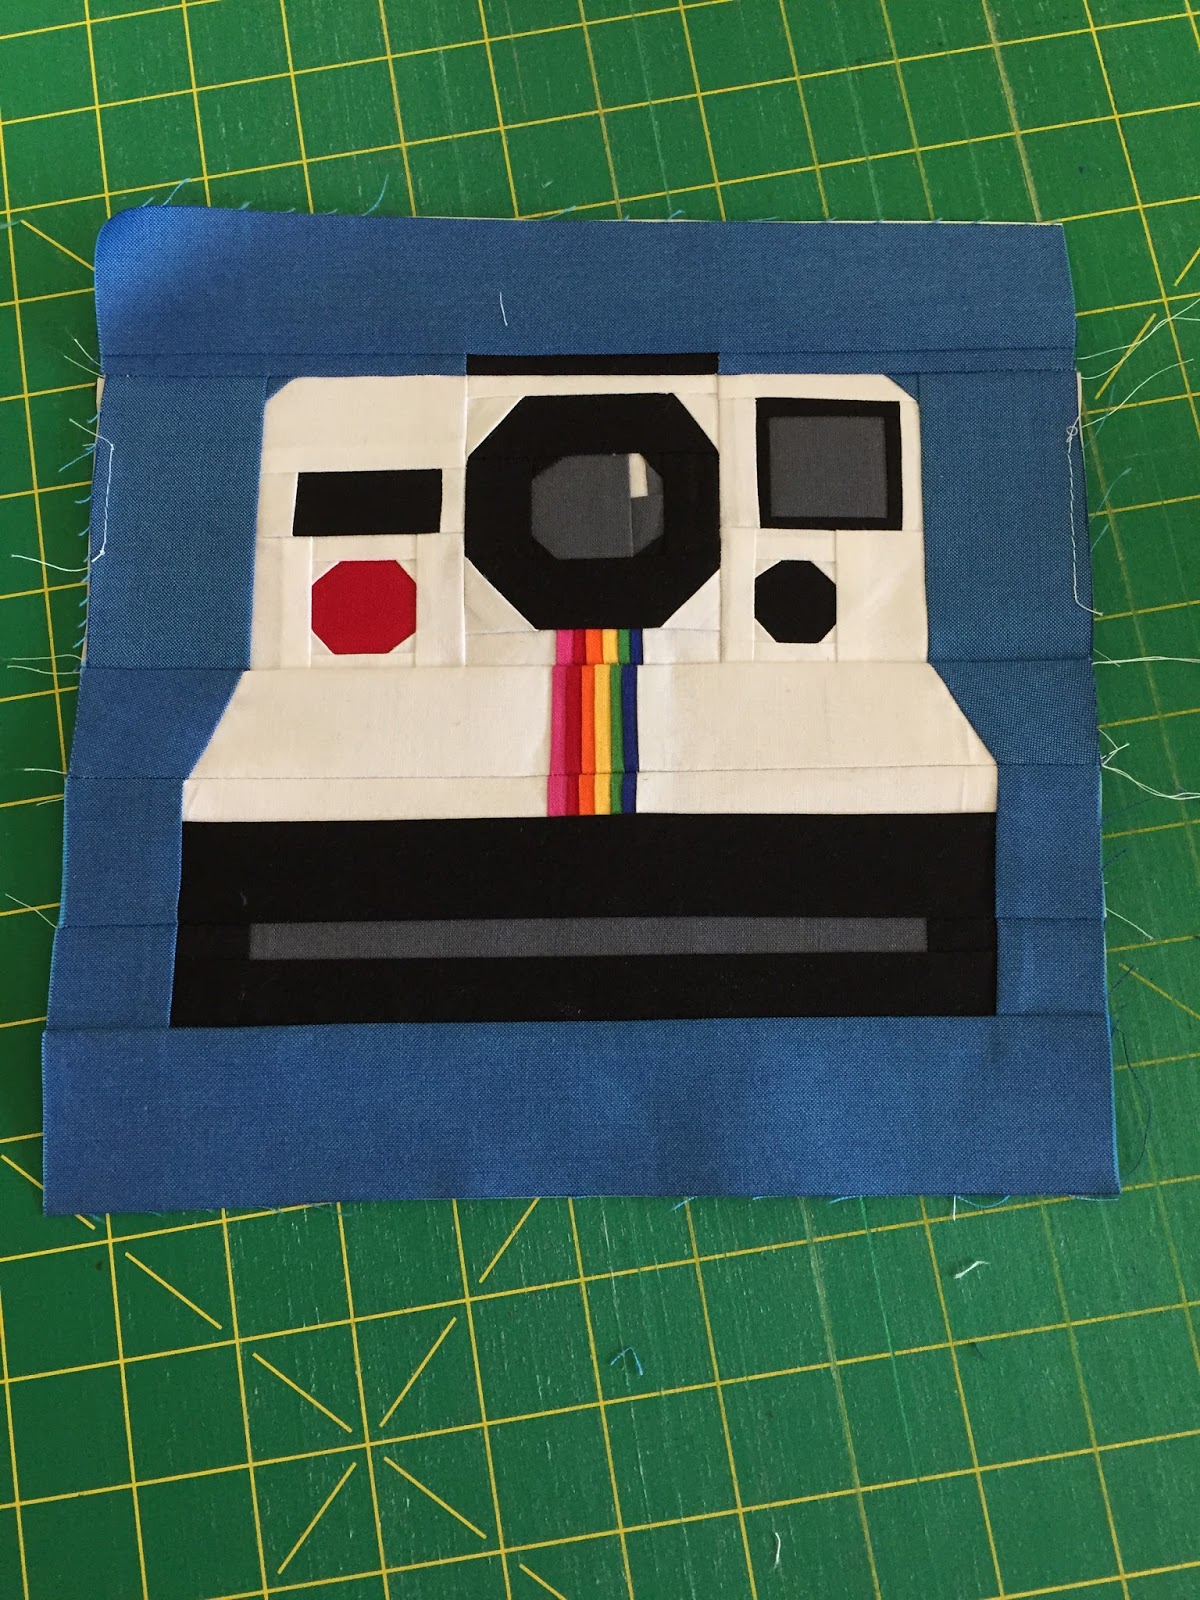
As I was making my blocks, I kept thinking of a paper-pieced Polaroid camera I had seen on craftsy.  It was amazing.  I really wanted to incorporate it somehow, but wasn't sure if I had the skills or patience for it.  There are many tiny pieces.  I finally decided that I could not stop thinking about it, so I HAD to make it.

Look at those tiny pieces.


I survived.  And it wasn't really that intimidating after all.  Paper-piecing produces such amazing results!!

Here is the camera. I LOVE it!


And here it is incorporated into the last block.


I am so glad I decided to make the plunge.  This quilt just wouldn't be the same without it!

If you'd like to make one, you can find the pattern here on Craftsy.

And here is the final result.


So much fun to look at!

The top finished up at about 90x90.  Now I just have to figure out how in the world to quilt it!  Any ideas?

If you are interested in making similar blocks, here are the measurements that I used:

For each "photo"
1. Cut a 3inch square novelty print.
2. From white fabric cut (2) 1x3 inch pieces , (1) 1x4 inch and (1) 1.5x4 inch.
3. Sew the (2) 1x3 inch pieces to either side of your novelty print. Sew the 1x4 inch on the TOP of your picture and the 1.5x4 inch piece on the BOTTOM of your picture.
4. From your background fabric (Mine is the blue.), cut (2) 2x4 and (2) 2x7
5.  Sew the shorter pieces to the sides and the the longer pieces to the top and bottom.
6. Trim your block to 6 1/2 inches using a square ruler.  Place your ruler on the block tilting to one side so that your blocks seem to be scattered all over the quilt.  **Note:  I wanted a few of my pictures to be really wonky so occasionally I cut some background pieces 2.5x4 and 2.5x8 to give me more room for tilting my ruler.
7. Arrange 9 blocks into a 9 patch design and sew together.  One block down!

Thanks for stopping by!

Tracy

Monday, February 22, 2016

February Rainbow Scrap Challenge

RSC16 

I am so excited to be playing along with this year's Rainbow Scrap Challenge.  So, excited that I am working on four different quilts for the  challenge.  I had so much fun last month with the color blue.  Check here for the post on last month's blocks.

February's Rainbow Scrap Challenge color is brown, with touches of pink.

 Brown just didn't work for me in any of the quilts.  So, I decided to use the colors in my February comfort quilt.  I had a lot of brown and pink fabrics lingering in my stash that I was no longer in love with, and some fabric given to me by friends that I just didn't love.  I knew that some little cuties would love these fabrics so, I got to work.

First, I pulled some brown and pink fabrics that needed to be used up:


Then, I drew up a quick plan.  Super simple and fun.


Then, I started sewing up those blocks:


Before I knew it, I had enough blocks for 2 little quilts!


 I used even more of the scraps making scrappy bindings.
They each finished about 41 x 54 inches.

I am so excited to have used up some stash, and have TWO quilts this month to donate.  Success!!

Thanks for stopping by!

Tracy

Tuesday, February 9, 2016

Embrace the Ugly!

The ugly Christmas sweater that is.

Have you seen Lorna's newest quilt along?  If not, jump on over to her blog and check it out here.


She is hosting a quilt along celebrating the ugly Christmas sweater.  I just love it because my boys have totally embraced the ugly Christmas sweater trend.  they have multiple sweaters and wear them all December long.  Som they are going to get such a kick out of this quilt.

Since, I love scraps and keep every. tiny. piece, I have lots and lots of random Christmas scraps.  I have 3 bags full actually.


There are all sorts of styles and colors in there, which will help make every sweater unique.  This will be a true scrap quilt!

Sweater Block #1 

Instead of doing the 9 patch, I decided to use one of the larger prints. Since it wasn't quite big enough, I added borders to it to blend in with the sweater, and I like it even better that way! 


Sweater Block #2


Sweater Block #3

I would have really loved some more of those blue accents on the bottom of the sweater, but I just didn't have enough.  I tried a few other fabrics, but nothing seemed right, so I just extended the red fabric down and left it plain.


I can't wait for the rest of the blocks to be released.  This will be such a fun quilt and a great way to use up these random little bits.

Thank you Lorna!

Thanks for stopping by!

Tracy

Friday, February 5, 2016

Simply Perfect Valentine Quilt

Sometimes simple is perfect.


I wanted to make a Valentine Quilt this year.  And I wanted it to actually be done by Valentine's day. So, I decided to keep it simple.

I bought a few 1/2 yard cuts of some sweet Tanya Whelan fabrics and added some red and white polka dots and some red gingham. I cut it all up into 6 inch squares to make the most of those 1/2 yard cuts and laid it all out on the floor.

I ended up with an 11 x 13 layout, making the quilt finish at about 60 x 71.

It is backed with the same white with red dots that I used in the front.  It is bound with the red and white dots fabric.

I decided I wanted to keep the quilting simple as well.  I quilted it my self on my teeny tiny machine.  This is the biggest quilt I've attempted to do on my machine and it came out great!  I just quilted 1/4 inch on either side of all the seams.  Just enough quilting to give it a nice soft feel.


I am so happy with how it turned out and how quickly it came together.


Sometimes perfectly simple is simply perfect!

Thank you for stopping by!

Tracy